Showing posts with label DIY. Show all posts

Tuesday, October 9, 2018

Halloween Mini Crystal Ball DIY

I shared my Crystal ball DIY with you and now I'm sharing how I made a handheld one for my daughter to carry around while dressed at a fortune teller.

What you'll need:


-Plastic Snow globe from Hobby Lobby

-Iridescent material from Michael's

-Battery operated candle from the dollar tree.

-Scissors

It won't take but a few minutes to put this together.

1. Unscrew the lid on your globe. You'll be an inner lid. Take that out.

2. Use your scissors to make a hole in the center of your inner cap.

3. Push the candle "flame" through the hole.

4. Fill the globe with the iridescent material.

5. Insert the inner cap followed by the outer cap.

6. When you want to turn it on, just unscrew the outer cap and flip the switch on your candle.


Thursday, September 20, 2018

Halloween Crystal Ball DIY

It's that time of year again!! Halloween is so close and I have a lot to do to prepare for our annual Halloween party. Truth be told I started decorating about a month ago. I go all out for Halloween so it takes me a long time to decorate.

This year is going to be even better. With the new house I have more space to decorate and a better backyard so I'm having to add new elements. I thought it would be fun to have a fortune teller display. I wasn't wanting to spend a ton of money on store bought decoration since I'm going to need a lot more.

Thought I'd share my DIY in case you wanted to try it for yourself...


(The tarot cards were purchased at Michael's and I used painters tape to tape them up along the walls)


For this craft you will need the following:

-A glass bowl in any size. I used a medium sized one I found at Michaels. It was $7.99 and I used a coupon to get it even cheaper.

-String lights. Also from Michael's. They were only $5.

-Iridescent basket filler also purchased at Michaels for $3.99. I wanted a roll of it to crumble up but all I could find anywhere was this stuff.

-Batteries for your lights. I used cheap dollar store ones since this was basically only going to be on the night of the party.

-cardboard 

-scissors

-marker

-hot glue gun and glue stick.

Once I had everything it was pretty simple and quick to put together. 

1. Turn the bowl upside down on the cardboard and trace where the glass touches.


2. Cut out the circle then cut a little nitch out for the string lights to pop out.


3. Fill the bowl with the iridescent material.


4. Next take your string lights and put them in your bowl mixed through-out the material.

5. Glue around the edge of your cardboard circle. Avoid gluing on the nitch you cut out. After turn upside down (or right side up)


6. Your ready to go! 

When Halloween is over you cant easily pop off the cardboard circle and remove everything and reuse your glass bowl for another holiday.


Saturday, November 12, 2016

AG Creation Adventures: Table & Terrarium

Today my daughter and I took the day to have some fun. My daughter loves her 18" dolls and has been wanting a few items for some time now. Problem is everything for these dolls cost way too much for my budget. So we decided to find out own way to make accessories for her dolls.  
We decided to take some pretty unusual objects to create something else.


What we have here are a platter, two decorative metal candle holders and a plastic flower vase.
We found all these items at the Dollar Tree.
We decided these would make a great table.
We flipped the vase and platter upside down and glued them together.
Next we flipped the candle holder upside down.
That's it!!
No joke, it was that simple.
And it only cost me $4 to make it.


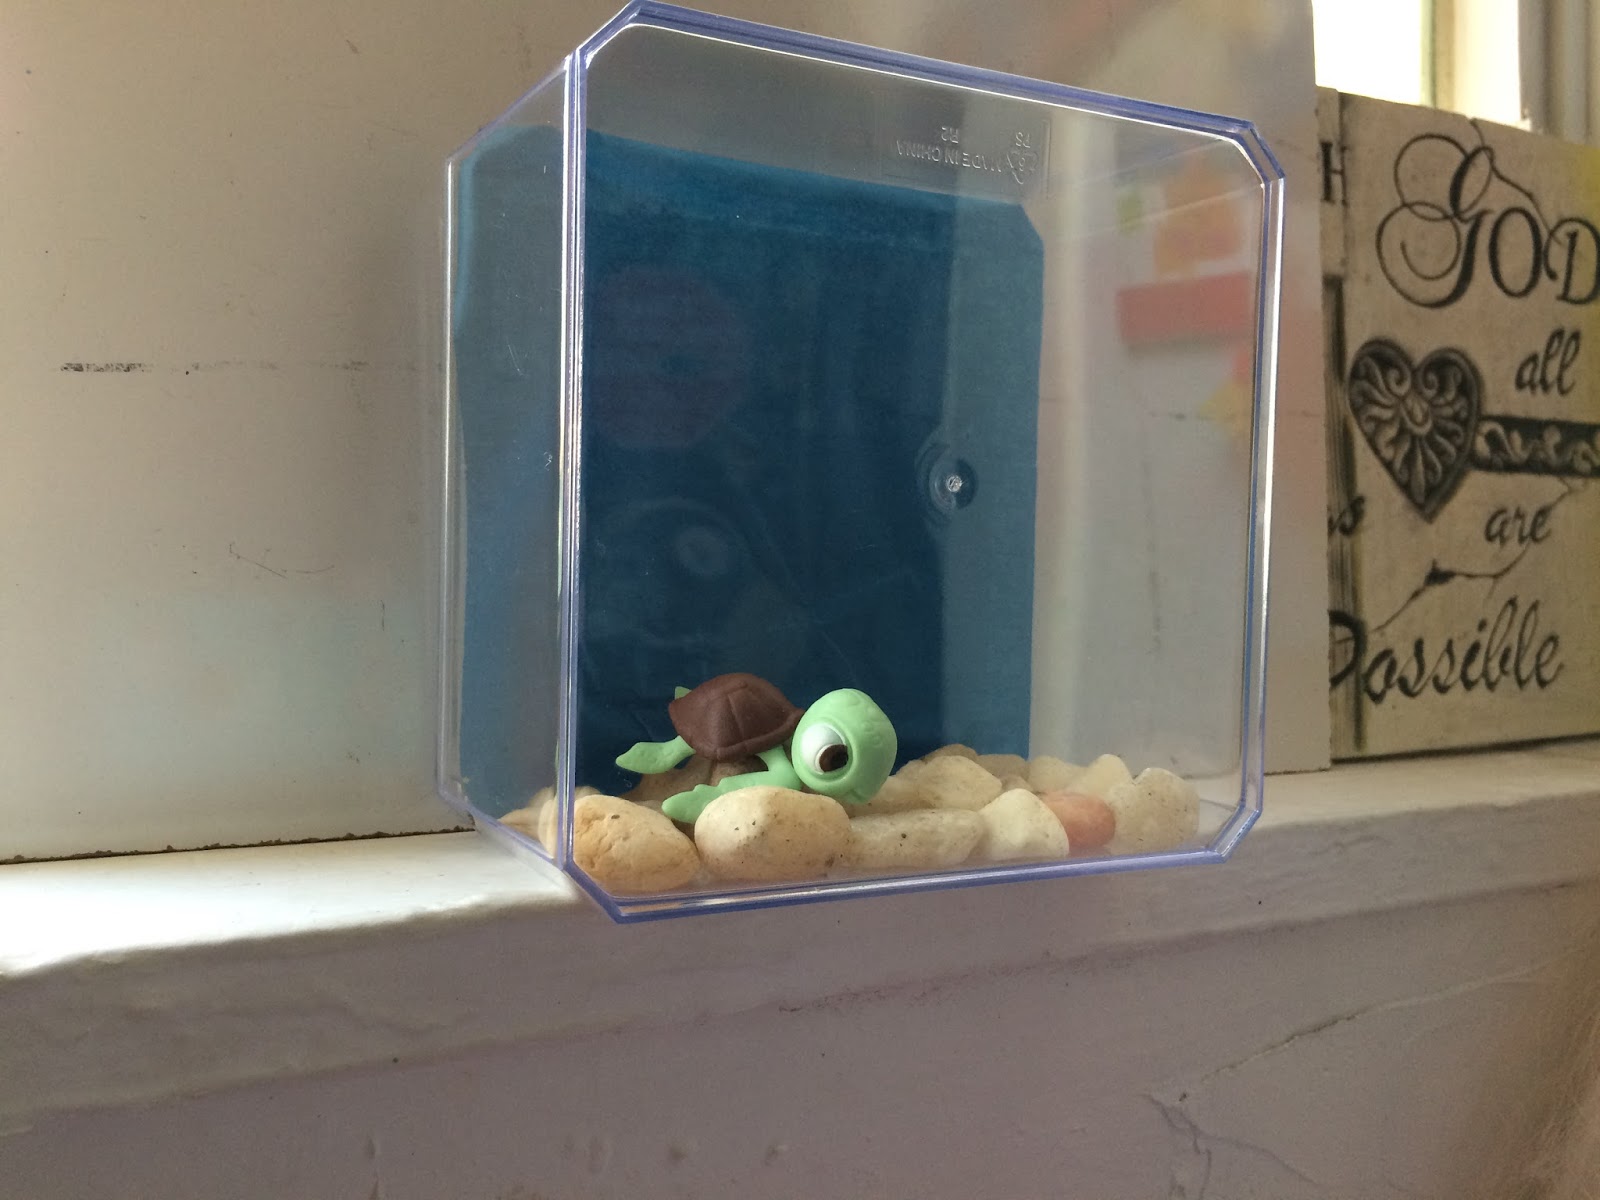
Our next project was a turtle terrarium.
Again the Dollar Tree had everything we needed.


We picked up a clear plastic jewelry and a Squirt figurine.
I already had the tissue paper and rocks at home but they sell those there as well.

We took the lid off the box and set it on its side.
Next we placed Squirt inside along with enough rocks to cover the bottom.
We taped a piece of tissue paper to the back so it looked like water.
This was a temporary thing until I print a picture of the ocean or coral to use.
Next we placed the lid on the box and we were done.


I have one very happy little girl,
and three very happy dolls.


We also picked up this plastic tea set that is perfect for her dolls.

More post coming soon for camping accessories!!


Saturday, September 24, 2016

DIY Halloween Costumes

Do you remember the Halloween costumes form when you were a kid? Remember how you would start planning your costume months ahead of time and then spend weeks bringing it to reality? Most kids these days have no idea what that's like. They just look in a catalog or walk into a store and pick one, ready to go. We'll this is the year we change all that.

I have put my foot down and told my daughter that we are making her costume this year. Together no less. It's time we bring creativity back to Halloween. This was half the fun growing up and I want my daughter to experience that as well. So here's some of our favorite DIY's that we found. Her costume may or may not be on here, but we aren't telling...yet!

1)  Sally from Nightmare Before Christmas
Check out this DIY from Holidappy.

2) Witches Costume

Check out this DIY from True Blue Me and You.

3) Peter Pan's Shadow
From Tikkido

4) Pocahontas

5) Flower pot

6) Black Cat

7)  Curios George

8) Mermaid

9) Waldo

10) Butterfly


For more ideas, check out my Pinterest 


Friday, April 8, 2016

DIY Mini S'more Campfire


Lanie just recently found out that she couldn't attend this years Girl Scout camping trip. She had been looking forward to this trip and talked about it all the time, and was upset she couldn't go camping. I wasn't sure what I was going to do to make this up to her. 

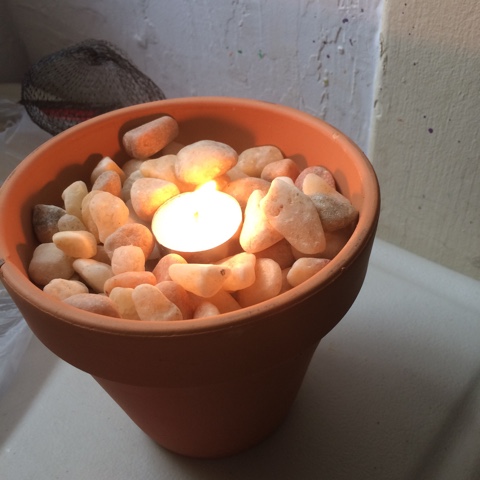
So in the spirit of trying to be better for her I decided Friday family fun would be a great idea. This weeks fun I decided would be s'mores. Since she can't go camping, I brought the campfire to her. Here's how to make your own indoor mini s'mores campfire:

What you'll need:
Ceramic pot
Potting soil (optional)
Rocks
Tea light candles
Lighter
Skewers
S'mores ingredients

1) take the ceramic pot and fill it halfway with soil. I decided to to this because I already had soil on hand. You can skip this step if you'd like. 

2) fill the pot the rest of the way with rocks. If you didn't use soil then fill the whole pot with rocks. I used the rocks from the candle section at Walmart. They were .97 cents a bag and I took 2 to fill half the pot. 

3) next take a tea light candle and place in the center and secure it in the rocks. Make sure it isn't wiggly. You can place how ever many tea light candles you can fit in whatever size pot your using. I recommend one per person if possible. I only used 1 for this. 

4) light candle and enjoy!! Just remember fire safety. You don't want to leave the candle burning unattended or with small children or let's near. 


(Look out for the next post containing our indoor camp out)